More Effective Line Timing with C++ Performance Validator
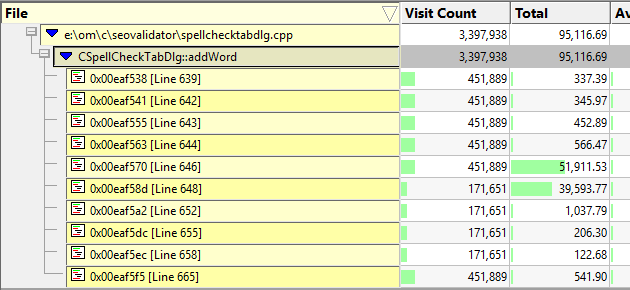
C++ Performance Validator has always had the ability to provide timing information for each line executed. However it has always been a bit clumsy to use – you could only enable line timing for all the methods that were being timed. This could result in slow execution due to methods you didn’t want line timed being line timed. You could filter them by file using the “Hooked Source Files” filter or the “Hooked File Types” filter, but that was about as granular as it got.
We’ve just introduced the capability to specify which classes, class methods and functions get line timed. So now, if you want to time just one function, or one method in a class, or time just the methods in a class, you can tell C++ Performance Validator to do that.
To introduce this capability we’ve had to add an additional filters setting in the Settings dialog, we’ve updated the line timing warning dialog to allow you to edit line timing filters right from the warning dialog and we’ve had to update the context menus on all the displays to include new options for line timing filters. We’ve also had to update the display of filtering information on the line timing display.
Updated Settings Dialog
We’ve added a new “Line Timing Filters” section to the settings dialog.
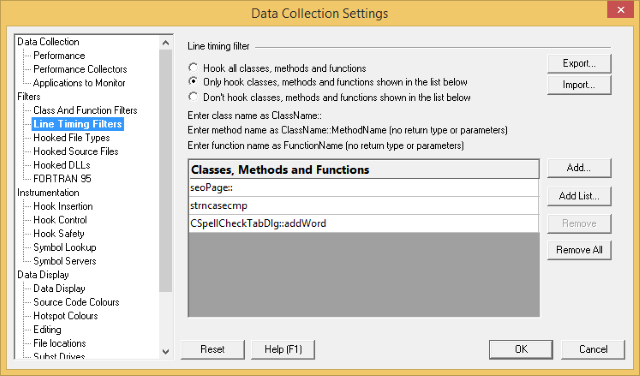
The image above shows three filters have been selected and that only the classes, methods and functions identified by the filters will be line timed. All other class, methods and functions will be ignored for line timing. All methods in the class seoPage will be filtered for line timing, as well as the method CSpellCheckTabDlg::addWord and the function strncasecmp.
Updated Line Timing Warnings
The Line Timing Warning dialog has been updated to allow you to edit line timing filters directly from the warning dialog. The Edit Line Timing Filters… button displays the Line Timing Filters dialog previously described.

Updated Context Menus
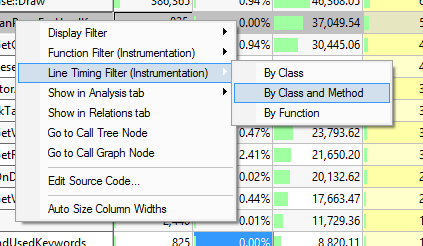
We’ve added a new submenu to the context menus on all displays and renamed the existing “Instrumentation” submenu to “Function Filter (instrumentation)”. The new submenu added is “Line Timing Filter (instrumentation)”. These new context menu entries allow you to easily specify that a class, a class method or a function should be selected for line timing.
How we expect these filters to be used
There are two main methods for using the line timing filters that come to mind.
- Specify the filters ahead of time.
- Specify the filters in response to function timing data you are looking at.
Specify the filters ahead of time
This method relies on you knowing your software code and having a very good idea which methods you think need line timing. Open the settings dialog, go to “Line Timing Filters” and enter your filters as appropriate. Be sure to set the filters to include or exclude methods for the use case you think is useful. For line timing, most of the time we expect you to be using the include setting and specifying just a few methods to line time.

Specify filters based on data.
The alternative way of using line timing is in response to some profiling data that you already have. Ideally you’ll have recorded this profiling data with line timing turned off (you can turn this on/off from the launch application dialog). Once you have the profiling data, search for functions that you think will benefit from additional tuning. When you have a candidate function, right click to get the context menu, then select if you want to profile the whole class, just that class method or just that function for line timing.
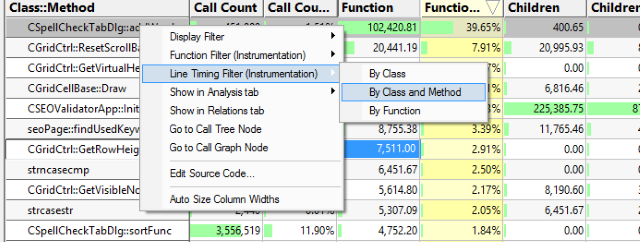
At the point you add line timing filters, if you have no line timing filters or the line timing filters are set to profile all classes, methods and functions, then the line timing filters will be set to profile just the classes, methods and functions identified by the filters. However, if there are pre-existing filters, the include/exclude setting of the line timing filter will not be changed – you will need to visit the Line Timing Filters settings dialog to change that setting if you want to switch from include to exclude or exclude to include. This design is deliberate as the main use case is to profile one or two methods (or all the methods in one class) – that use case is “include”, which is why this is the default behaviour.
If you have already recorded a session with line timing data and you specify some line timing filters, C++ Performance Validator will update the line timing display to grey out the classes, class methods and functions that will not be instrumented on the next run.
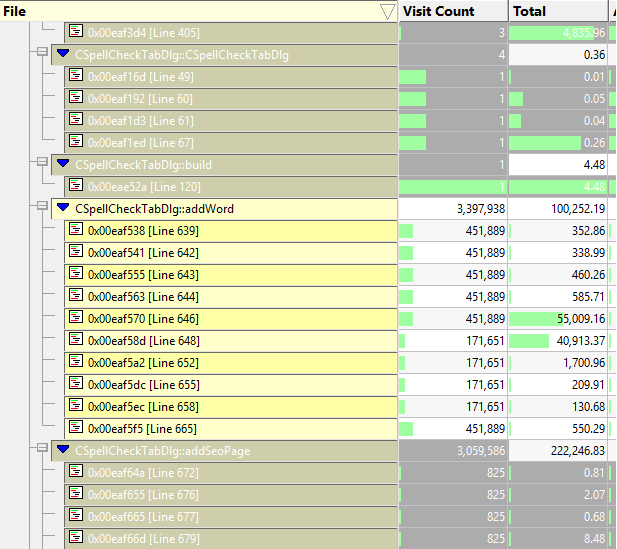
Line Timing Results
Once you have the filter(s) you need setup you can run a new profiling session to get the line timing data you need.
